If your bathroom countertop is always crowded, the problem is usually system design, not storage quantity. This guide gives you a practical setup for bathroom countertop organizer ideas that stay tidy after week one.
Instead of buying random trays, start with item frequency and usage flow. Daily items stay visible; weekly and backup items move to secondary zones. This one change usually solves 70% of clutter.
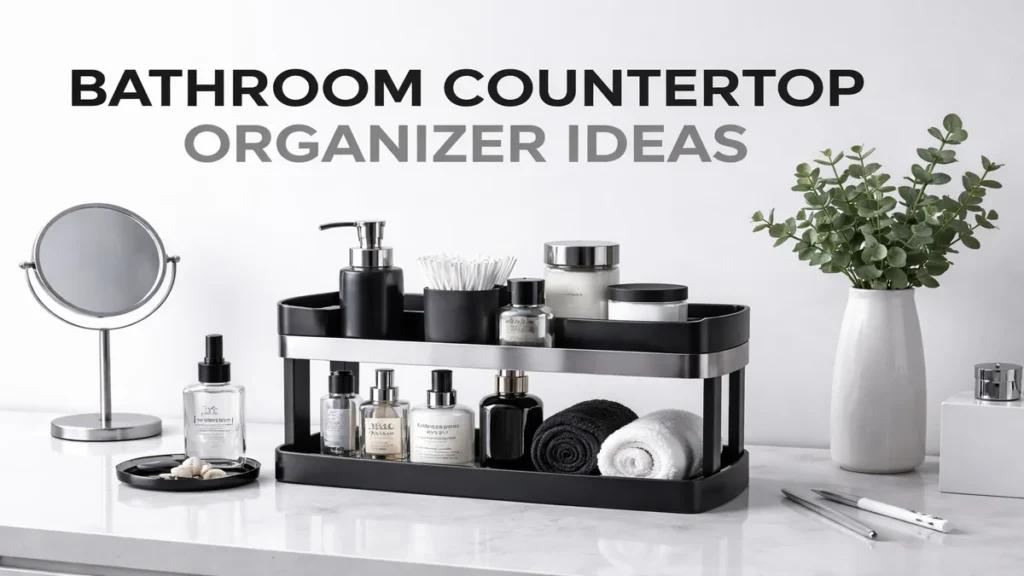
Bathroom Countertop Organizer Ideas: Start With 3 Functional Zones
- Daily zone: toothbrush, cleanser, hand soap, moisturizer.
- Weekly zone: hair tools, masks, treatment products.
- Reserve zone: refill packs, guest items, extra stock.
Keep only daily-use items on the countertop. Everything else goes to drawers, cabinets, or a vertical organizer. Countertop space should support routine, not hold inventory.
How to Choose the Right Organizer Type
Open trays
Best for quick-access products used every day. Avoid overfilling or they become visual clutter.
Tiered organizers
Great for maximizing vertical space in small bathrooms. Put tallest items at the back and daily essentials in front.
Drawer inserts
Best for reducing countertop load entirely. Group by function (oral care, skincare, hair) and label sections if shared.
Lidded bins
Ideal for reserve stock and low-frequency products. Keeps dust and humidity impact lower.
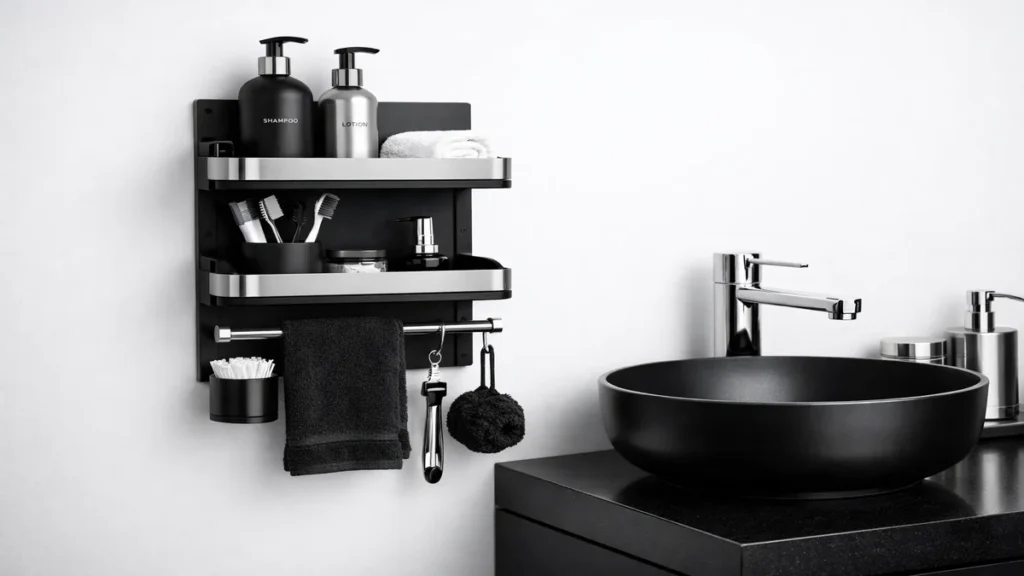
Bathroom Countertop Organizer Ideas for Small Spaces
For small bathrooms, prioritize footprint efficiency first. One narrow vertical unit often beats multiple desktop trays.
- Use corner organizers to recover dead space.
- Move bulky tools to wall-mounted or under-sink holders.
- Use one in-use item per category; backups off-counter.
- Standardize container sizes for cleaner visual rhythm.
Common Mistakes That Break Organization Systems
- Buying organizers before auditing what you actually own.
- Mixing too many container styles and heights.
- Keeping all backups on the countertop “for convenience”.
- No weekly reset routine.
A reliable setup should take less than 10 minutes per week to maintain. If it takes longer, simplify.
Budget Plan: What to Buy First
Priority 1: one daily-use tray + one drawer insert set + labels.
Priority 2: one vertical organizer for overflow categories.
Skip first: decorative multi-piece sets without clear function mapping.
Most bathrooms can be stabilized with a small budget if layout logic is correct.

30-Minute Implementation Checklist
- Remove all countertop items.
- Sort into Daily / Weekly / Reserve.
- Return only Daily items to countertop.
- Assign storage containers for Weekly and Reserve.
- Add labels and set a weekly 10-minute reset.
Conclusion
The best bathroom countertop organizer ideas are not about adding more containers—they’re about reducing decision friction. Keep daily items visible, move stock out of sight, and maintain with a short weekly reset. That’s what keeps counters clean over time.
Advanced Layout Patterns for Different Bathroom Types
Single-user compact bathroom
Keep one narrow daily tray and one drawer insert. The goal is to reduce visual noise and keep cleaning paths open. If your sink edge is narrow, use a vertical two-tier organizer instead of spreading items horizontally.
Shared family bathroom
Create personal lanes: one lane per person for daily products, one shared lane for cleaning and hygiene essentials. Label each lane and limit each person to one visible in-use product per category.
Guest bathroom setup
Prioritize simplicity: hand soap, hand towel, tissue, and a compact guest kit. Keep backup stock hidden. Guest bathrooms perform best when they feel clear and predictable.
Material Selection and Moisture Resistance
In humid bathrooms, material choice matters as much as layout. Acrylic and coated metal usually clean faster than unfinished wood. Avoid absorbent materials near splash zones, and choose containers with smooth edges to reduce residue buildup.
- Best for humid zones: acrylic, coated steel, ceramic trays
- Use with caution: untreated bamboo near sink splash areas
- Maintenance tip: wipe high-touch containers every 2-3 days
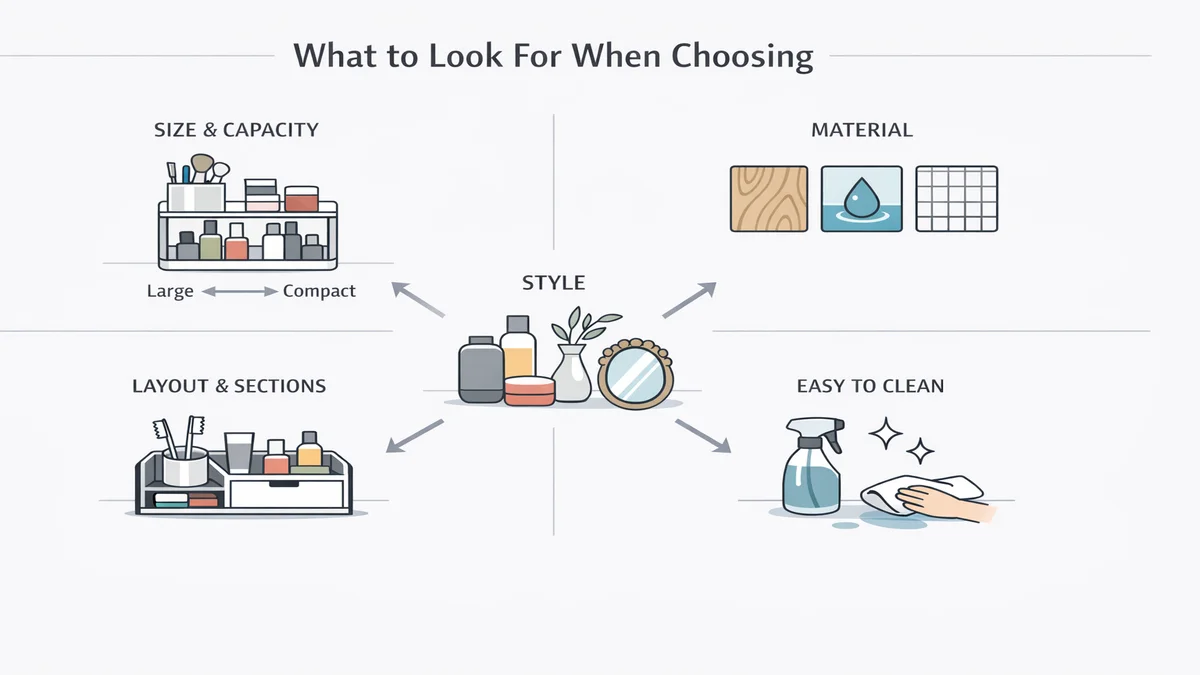
Practical Product Criteria Checklist
Before buying any organizer, score it from 1-5 on these criteria:
- Fits your measured space without blocking faucet movement
- Supports your most-used product heights
- Can be cleaned in under 60 seconds
- Improves reachability for daily items
- Looks consistent with your existing storage pieces
If an item scores below 18/25, skip it. A strict checklist prevents impulse buys and reduces setup churn.
Weekly and Monthly Maintenance Rhythm
Weekly (10 minutes): remove empties, wipe trays, reset labels, return items to zones.
Monthly (20 minutes): check duplicates, move seasonal products out, deep clean one drawer or shelf, update what remains visible.
This rhythm is what keeps organization systems stable. Without cadence, even good layouts decay.
Troubleshooting: If Clutter Keeps Coming Back
- Problem: Counter refills after 2 days. Fix: daily zone too large; reduce visible items by 30%.
- Problem: Hard to clean around organizers. Fix: switch to fewer pieces with larger footprint stability.
- Problem: Family ignores labels. Fix: simplify to icon/initial labels and one-zone ownership rules.
- Problem: Overflow keeps growing. Fix: set a backup cap (e.g., max two unopened units per category).
Optimization Scenario 1
Scenario 1: audit one category end-to-end (skincare, oral care, hair, cleaning). Remove duplicates, keep one active item visible, and move backups to a labeled reserve bin. This reduces countertop load and improves retrieval speed.
Scenario 1: test your layout for one week and track friction points. If items keep drifting, the location is wrong. Move the item closer to where it is used, then reassess after three days.
Scenario 1: define a hard capacity limit for each zone. Capacity limits prevent gradual clutter and make restocking rules predictable across shared households.
Optimization Scenario 2
Scenario 2: audit one category end-to-end (skincare, oral care, hair, cleaning). Remove duplicates, keep one active item visible, and move backups to a labeled reserve bin. This reduces countertop load and improves retrieval speed.
Scenario 2: test your layout for one week and track friction points. If items keep drifting, the location is wrong. Move the item closer to where it is used, then reassess after three days.
Scenario 2: define a hard capacity limit for each zone. Capacity limits prevent gradual clutter and make restocking rules predictable across shared households.
Optimization Scenario 3
Scenario 3: audit one category end-to-end (skincare, oral care, hair, cleaning). Remove duplicates, keep one active item visible, and move backups to a labeled reserve bin. This reduces countertop load and improves retrieval speed.
Scenario 3: test your layout for one week and track friction points. If items keep drifting, the location is wrong. Move the item closer to where it is used, then reassess after three days.
Scenario 3: define a hard capacity limit for each zone. Capacity limits prevent gradual clutter and make restocking rules predictable across shared households.
Optimization Scenario 4
Scenario 4: audit one category end-to-end (skincare, oral care, hair, cleaning). Remove duplicates, keep one active item visible, and move backups to a labeled reserve bin. This reduces countertop load and improves retrieval speed.
Scenario 4: test your layout for one week and track friction points. If items keep drifting, the location is wrong. Move the item closer to where it is used, then reassess after three days.
Scenario 4: define a hard capacity limit for each zone. Capacity limits prevent gradual clutter and make restocking rules predictable across shared households.
Optimization Scenario 5
Scenario 5: audit one category end-to-end (skincare, oral care, hair, cleaning). Remove duplicates, keep one active item visible, and move backups to a labeled reserve bin. This reduces countertop load and improves retrieval speed.
Scenario 5: test your layout for one week and track friction points. If items keep drifting, the location is wrong. Move the item closer to where it is used, then reassess after three days.
Scenario 5: define a hard capacity limit for each zone. Capacity limits prevent gradual clutter and make restocking rules predictable across shared households.
Optimization Scenario 6
Scenario 6: audit one category end-to-end (skincare, oral care, hair, cleaning). Remove duplicates, keep one active item visible, and move backups to a labeled reserve bin. This reduces countertop load and improves retrieval speed.
Scenario 6: test your layout for one week and track friction points. If items keep drifting, the location is wrong. Move the item closer to where it is used, then reassess after three days.
Scenario 6: define a hard capacity limit for each zone. Capacity limits prevent gradual clutter and make restocking rules predictable across shared households.
Optimization Scenario 7
Scenario 7: audit one category end-to-end (skincare, oral care, hair, cleaning). Remove duplicates, keep one active item visible, and move backups to a labeled reserve bin. This reduces countertop load and improves retrieval speed.
Scenario 7: test your layout for one week and track friction points. If items keep drifting, the location is wrong. Move the item closer to where it is used, then reassess after three days.
Scenario 7: define a hard capacity limit for each zone. Capacity limits prevent gradual clutter and make restocking rules predictable across shared households.
Optimization Scenario 8
Scenario 8: audit one category end-to-end (skincare, oral care, hair, cleaning). Remove duplicates, keep one active item visible, and move backups to a labeled reserve bin. This reduces countertop load and improves retrieval speed.
Scenario 8: test your layout for one week and track friction points. If items keep drifting, the location is wrong. Move the item closer to where it is used, then reassess after three days.
Scenario 8: define a hard capacity limit for each zone. Capacity limits prevent gradual clutter and make restocking rules predictable across shared households.
Optimization Scenario 9
Scenario 9: audit one category end-to-end (skincare, oral care, hair, cleaning). Remove duplicates, keep one active item visible, and move backups to a labeled reserve bin. This reduces countertop load and improves retrieval speed.
Scenario 9: test your layout for one week and track friction points. If items keep drifting, the location is wrong. Move the item closer to where it is used, then reassess after three days.
Scenario 9: define a hard capacity limit for each zone. Capacity limits prevent gradual clutter and make restocking rules predictable across shared households.
Optimization Scenario 10
Scenario 10: audit one category end-to-end (skincare, oral care, hair, cleaning). Remove duplicates, keep one active item visible, and move backups to a labeled reserve bin. This reduces countertop load and improves retrieval speed.
Scenario 10: test your layout for one week and track friction points. If items keep drifting, the location is wrong. Move the item closer to where it is used, then reassess after three days.
Scenario 10: define a hard capacity limit for each zone. Capacity limits prevent gradual clutter and make restocking rules predictable across shared households.
Optimization Scenario 11
Scenario 11: audit one category end-to-end (skincare, oral care, hair, cleaning). Remove duplicates, keep one active item visible, and move backups to a labeled reserve bin. This reduces countertop load and improves retrieval speed.
Scenario 11: test your layout for one week and track friction points. If items keep drifting, the location is wrong. Move the item closer to where it is used, then reassess after three days.
Scenario 11: define a hard capacity limit for each zone. Capacity limits prevent gradual clutter and make restocking rules predictable across shared households.
Optimization Scenario 12
Scenario 12: audit one category end-to-end (skincare, oral care, hair, cleaning). Remove duplicates, keep one active item visible, and move backups to a labeled reserve bin. This reduces countertop load and improves retrieval speed.
Scenario 12: test your layout for one week and track friction points. If items keep drifting, the location is wrong. Move the item closer to where it is used, then reassess after three days.
Scenario 12: define a hard capacity limit for each zone. Capacity limits prevent gradual clutter and make restocking rules predictable across shared households.
Optimization Scenario 13
Scenario 13: audit one category end-to-end (skincare, oral care, hair, cleaning). Remove duplicates, keep one active item visible, and move backups to a labeled reserve bin. This reduces countertop load and improves retrieval speed.
Scenario 13: test your layout for one week and track friction points. If items keep drifting, the location is wrong. Move the item closer to where it is used, then reassess after three days.
Scenario 13: define a hard capacity limit for each zone. Capacity limits prevent gradual clutter and make restocking rules predictable across shared households.